
If you are wondering how to use VM arguments in your Munit tests, you’re in the right place! This article will show you how to painlessly integrate VM arguments in Munit tests.
Mulesoft applications need VM arguments on several occasions to be parametrized according to the project’s requirements. To test your project correctly, you’ll also need to parametrize your tests.
VM arguments in your tests can be painlessly added smartly: before getting into the explanation, let me introduce myself.
My name is Lorenzo Neri, a Cap4 Lab integration engineer. Several times during my working time, I met many different problems I tried to solve, then afterward, a question came to my mind: “What if I bring help to other people to solve my same problem?”.
How to use and integrate VM arguments in your Munit tests
Munit tests execution is quite different from Mule applications, so we need another workaround, a sort of cheat, to use VM arguments as we want.
If you think about the mechanism behind VM arguments. This is not as different as the configuration properties. They’re always named constants to be added into the execution, right? 😉
That’s not sufficient, but here comes the second cheat’s part.
Munit tests are XML files, which means they can be configured!
Munit offers a specific XML tag to use VM arguments in the tests themselves!
According to the Mule official documentation, you need the “munit: parametrizations” XML tag.
You have two different roads to proceed.
The first way to Munit parametrization for VM arguments: global elements
Once you have created your test suite into Anypoint Studio, you can go to the “Global Elements” section: the “Munit configuration” element will be there as default.
With a double click over the element, a modal window appears: click over the “green plus icon” to create a new parametrization naming it:

Click “OK” to proceed.
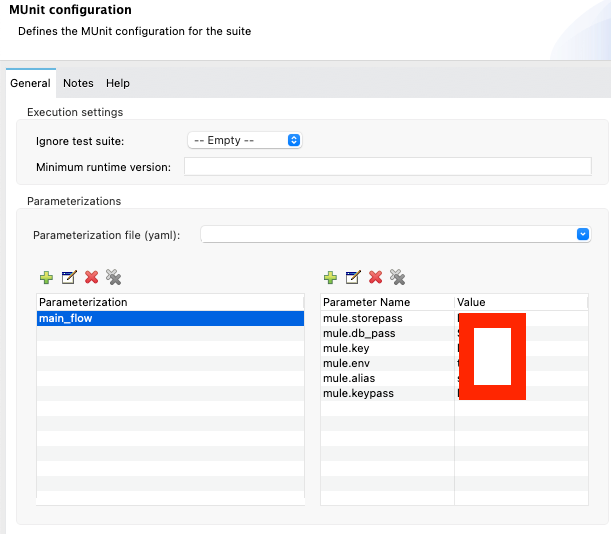
Now that you created a parametrization, an additional table to the right side of the “Parametrization” one appears: here is where you’ll create your VM arguments!
What you’ll have to do? If you click over the “green plus icon” over the new appeared table, an additional modal window appears.
Then, you’ll have to give a “Parameter name” and a “Value”: In a nutshell, these are the same exact name and value you have already used to create a VM argument.
For instance:

Once you have created all of the VM arguments you need, you can start your tests painlessly and successfully:
To conclude, let’s see the second way to parametrize your Munit tests.
How to parametrize your Munit tests via XML
Now that you’re familiar with Munit tests parametrization and you understand how to use VM arguments in them, there’s another way to do so: XML.
In the previous part of the article, you understood that Munit offers XML tags to parametrize tests and which tags are in charge of this process.
What if I tell you that there’s nothing different but writing XML tags instead of populating a table?
<munit:config name="my_app-test-suite.xml">
		<munit:parameterizations>
		<munit:parameterization name="main_flow" >
				<munit:parameters >
					<munit:parameter propertyName="mule.storepass" value="value" />
					<munit:parameter propertyName="mule.db_pass" value="value" />
					<munit:parameter propertyName="mule.key" value="value" />
					<munit:parameter propertyName="mule.env" value="value" />
					<munit:parameter propertyName="mule.alias" value="value" />
					<munit:parameter propertyName="mule.keypass" value="value" />
				</munit:parameters>
			</munit:parameterization>
		</munit:parameterizations>
	</munit:config>
As you can see, this is the XML generated from the previous procedure. To parametrize your test with VM arguments with XML, you can directly edit your test suite by clicking on the “Configuration XML” tab.
In conclusion, creating a <munit:parameterizations> tag, followed by a named <munit:parameterization> with related parameters as you could see. A munit:parameter tag has to be written down per each VM argument.